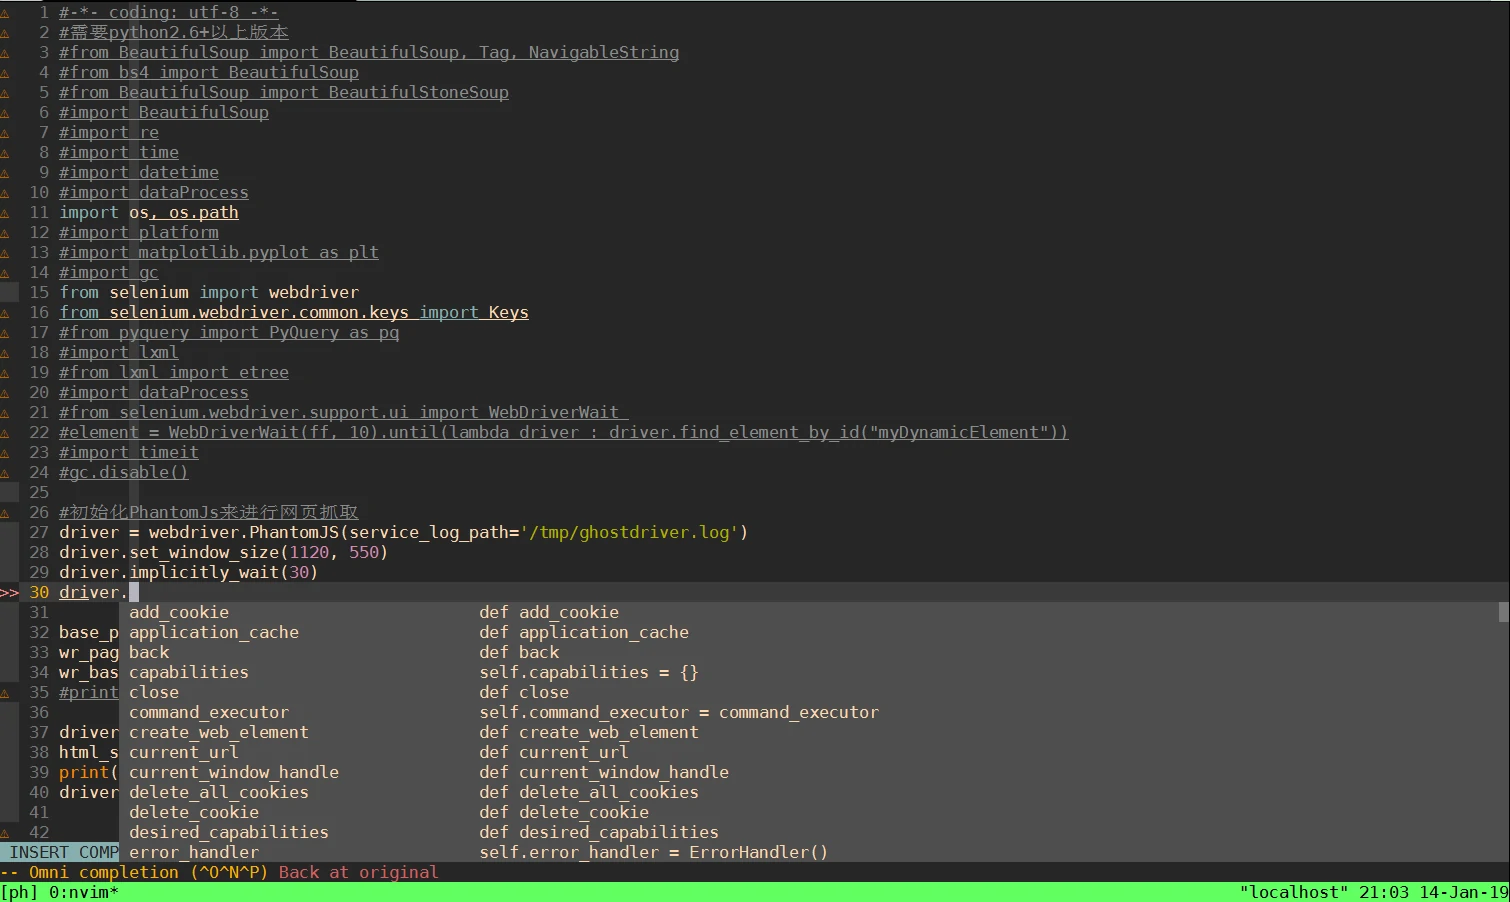
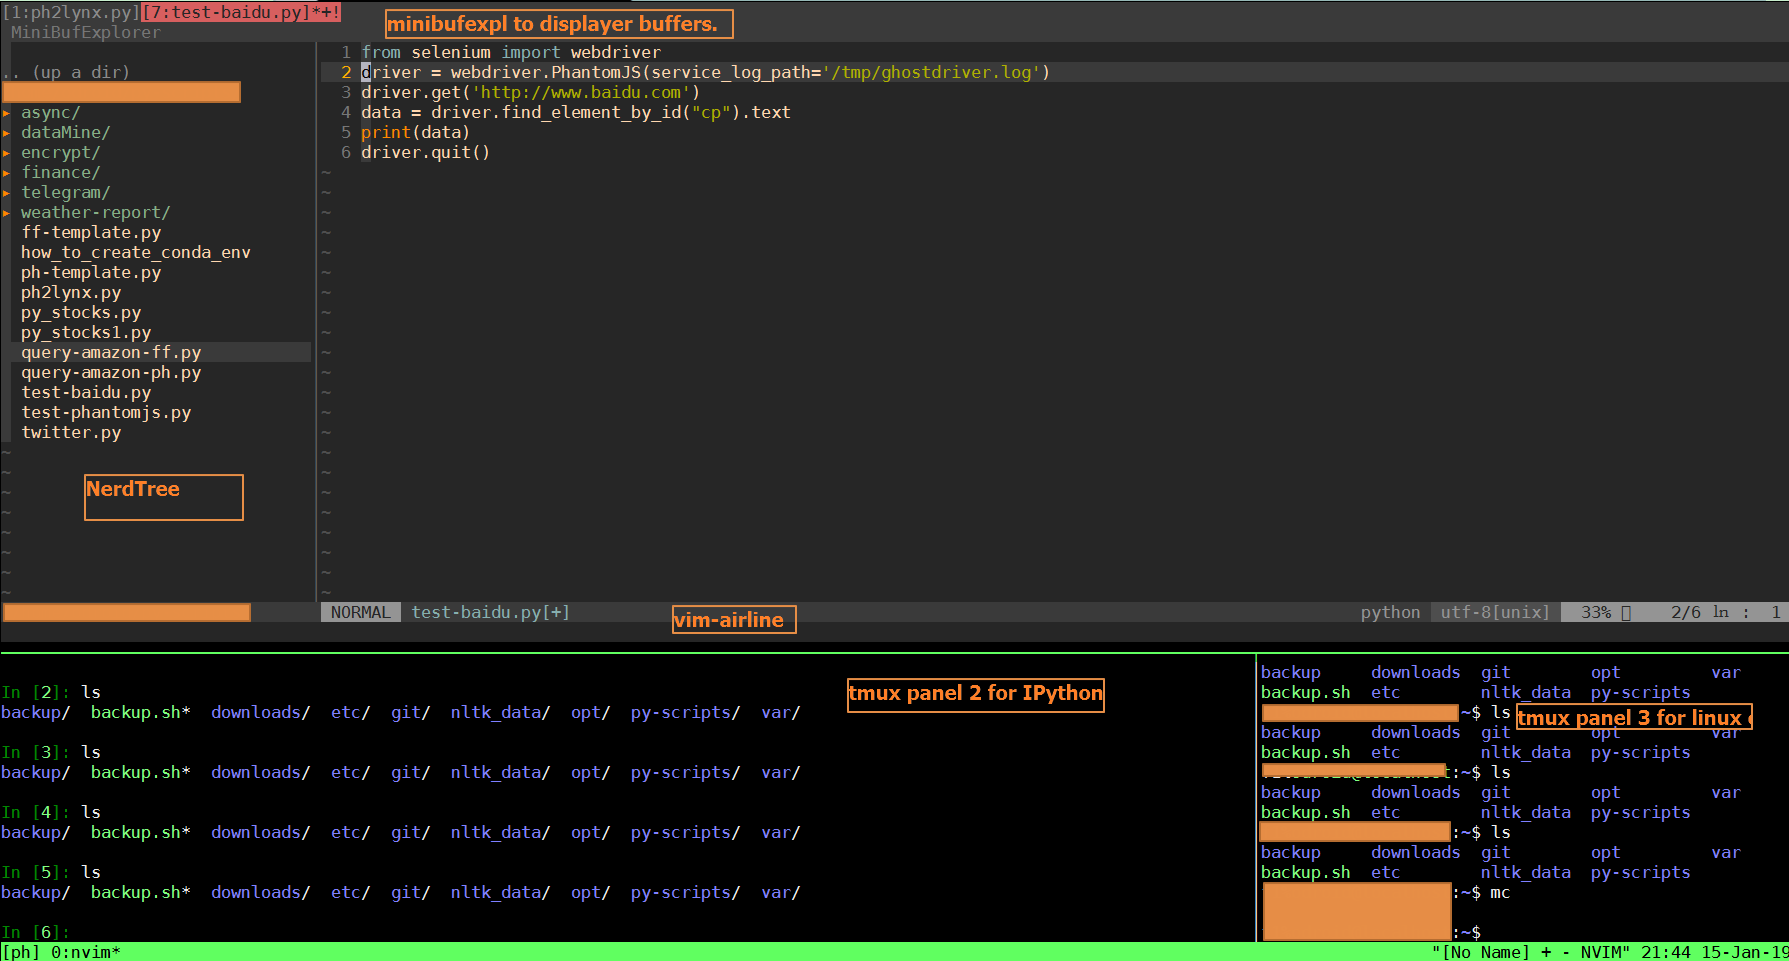
Most content comes from neovim, coc.nvim and Jiedong Hao's "Linux 下 Neovim 安装与配置 Pyhton 开发环境指南".
Add personal configurations and tweaks during installation.
Install neovim
Configuration of neovim is stored under ~/.config/nvim/init.vim. Create one if it does not exist.
Most .vimrc configurations can be copied into init.vim file.
Make sure neovim uses correct Python env.
"disable Python2
let g:loaded_python_provider = 1
"specify Python3 env
let g:python3_host_prog = '/path/to/python'
Install pynvim/neovim in your preferred env.
Install vim-plug
1. Following command above will pull plug.vim from wesite and store it under .local/share/nvim/site/autoload. Neovim will load plugins inside this folder when it starts.
curl -fLo ~/.local/share/nvim/site/autoload/plug.vim --create-dirs \
    https://raw.githubusercontent.com/junegunn/vim-plug/master/plug.vim
2. vim-plug needs configurations as below in init.vim
call plug#begin('~/.local/share/nvim/plugged')
Plug 'plugin name'
call plug#end()
3. After adding plugins in init.vim, use following commands in nvim to manage plugins:
:PlugInstall #to install plugins added in init.vim
:PlugUpdate #to update plugins
:PlugStatus #to check plugins' status.
:PlugUpgrade # to upgrade vim-plug.
:PlugClean #to remove plugin, need to comment the plugin in init.vim first.
Configure nvim to have programming friendly features.
Install coc.nvim
Full LSP completion support, especially snippet and additionalTextEdit feature, you'll understand why it's awesome when you experience it with coc extension like coc-tsserver.
Does completion resolve on completion item change. The detail from complete item is echoed after selected, we will have floating window for documentation when floating window is supported.
Start completion without timer. The completion would start after you type first letter of word by default, and filtered with new input when completion finished, while some completion engine use timer to trigger completion and you always have to wait after type character.
Realtime buffer keywords. Coc generate buffer keywords on buffer change in background (with debounce), while some completion engines use cache which could be wrong sometimes. And Locality bonus feature from VSCode is enabled by default.
Filter completion items when possible. When your does fuzzy filter with completion items (which would trigger TextChangedI during completion), some completion engines would trigger new completion, but coc filter the items when possible which makes coc much faster. Filter completion items on backspace is also supported.
1. Install coc.nvim following website instructions.
2. Add coc.nvim to init.vim:
" Use release branch
Plug 'neoclide/coc.nvim', {'branch': 'release'}
3. Default system nodejs is too old. It is suggested to install latest nodejs and yarn manually to avoid any weired errors.
sudo curl -sL install-node.now.sh/lts | sudo sh
##curl --compressed -o- -L https://yarnpkg.com/install.sh | bash
4. Enter nvim, type :PlugInstall. It will install yarn togather with coc.nvim.
5. coc.nvim supports multiple languages. For Python, the submodule is called coc-pyls. Install python-language-server first through conda or pip.
conda install -c conda-forge python-language-server
6. Install coc-python in neovim:
:CocInstall coc-python
7. Usage:
:CocConfig #open coc configureations
Ctrl-N to jump through candidates.
Now you should be able to experience auto completion feature of coc.nvim.

coc.nvim uses similar commands to manage its submodules. Other languages supports can be found at: https://www.npmjs.com/search?q=keywords%3Acoc.nvim
Install jedi-vim
Besides auto completion, jedi-vim also provides go-to function between code blocks. Here it install jedi-vim but disables its auto completion function.
Waring: jedi-vim could slow down coc.nvim a lot. Disable it if you find coc.nvim works too slowly.
1. Add following in init.vim:
Plug 'davidhalter/jedi-vim'
2. In nvim, type :PlugInstall.
3. Add following lines in init.vim:
let g:jedi#completions_enabled=0
let g:jedi#use_splits_not_buffers="right"
4. Usage:
<leader>d: go to definition
K: check documentation of class or method
<leader>n: show the usage of a name in current file.
<leader>r: rename a name.
Install vim-surround
vim-surround adds function to replace, add enlcoures like ", ', [, \<q>, etc...
1. Add following in init.vim:
Plug 'tpope/vim-surround'
2. :PlugInstall.
3. Usage:
cs"'` # replace " around the word to
cs'<q>` # replace ' arond the word to <q>
>ds"` # remove delimiters around words.
"|" in the following examples means cursor location. In insert mode, try following commands:
Ctrl-s( --> (|)
Ctrl-s[ --> [|]
Ctrl-s] --> [|]
Ctrl-ss{ -->
{
  |
}
//ss stands for quick double s
Install vim-airline
vim-airline can display more useful info in status bar.
1. Add following in init.vim:
Plug 'vim-airline/vim-airline'
2. :PlugInstall
Install gruvbox theme
1. Add following in init.vim:
Plug 'vim-airline/vim-airline'
2. Add following in init.vim:
Plug 'morhetz/gruvbox'
3. :PlugInstall
4. Add following in init.vim:
colorscheme gruvbox
5. In nvim, use these to switch between dark and light modes:
set background=dark or set background=light
Install minibufexpl
minibufexpl displayers buffers in tab. It is not necessary if you can remember :ls to check buffers list.
1. Add following in init.vim:
Plug 'fholgado/minibufexpl.vim'
2. :PlugInstall
3. Usage:
:bd to close current buffer.
:b7 to jump to buffer 7.
Fix color display issue of vim in tmux.
1. Add following in ~/.bashrc:
export TERM=xterm-256color
2. Add following in ~/.config/nvim/init.vim:
set t_ut=
3. Add following in ~/.tmux.conf:
setw -g xterm-keys
set -g default-terminal "screen-256color"
Edit files on remote machines
cd
mkdir interserver
sshfs -o idmap=user xxx@vps_ip:/path/to/ interserver
interserver is worksapce on local machine. xxx is user on remote machine, vps_ip is ip of vps. /path/to/ is folder on remote machine.
Final Looking
